|
|
|
 |
Shifting cable how-to |  |
|
How to on mouting the shifter This is some pictures showing where to mount the shifting assembly and where to cut the holes for the cables. There also some pictures that can help you out in the september issue of sport compact car(i think) it has 400hp club cover. |
|
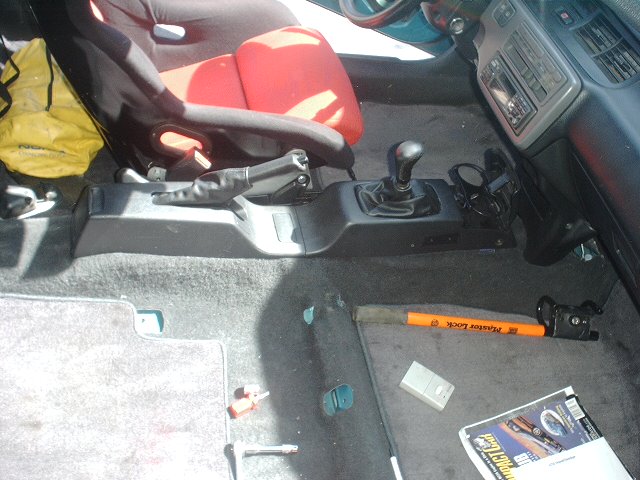
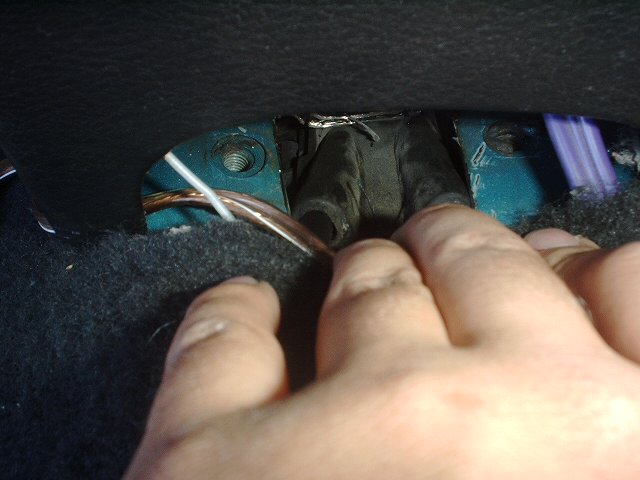 Sorry its a really bad picture but you want to take off your carpet before cutting the holes, also take off the center console(Ashtray and shifting,handbrake) Once everything is disconnected. Carpet, ashytray,shifting console w/handbrake. You need to cut two holes one to mount the shifting assembly flush to you body(kinda big) and a smaller hole so your cables are able to enter your cabin.The small hole should be about 3.5-4"x3". As you can see in the picture my hole is a bit small and the cables push agaisnt the sides of the cut.The second bigger hole, start off by cutting the outer ring of the shifting hole, It has a rounded up edge around the hole your ganna need to cut it so its flush and able to mount the shifting assembly to the body. |
|
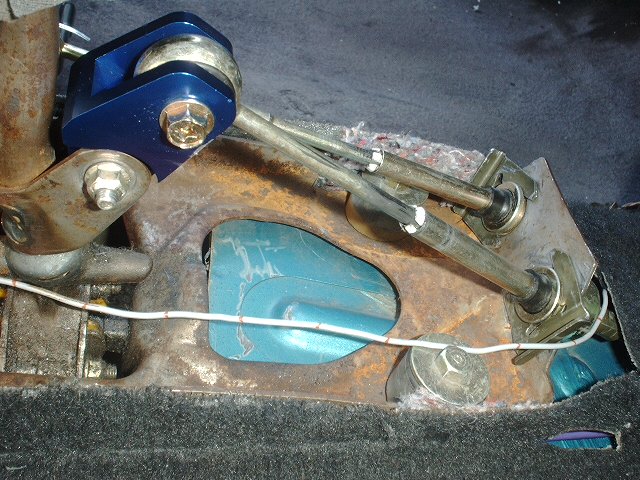 Shifter assembly w/Short shifter Once the you cut the ring flush to the body place the shifting assembly on top you"ll notice that the buttom part sticks out in the left buttom corner. Your ganna need to cut away more of the ring so it can sit below. All this can be done by looking and cutting making it bigger and bigger until it fits. Not really hard at all. The smaller hole for the cables is a bit harder due to the location of the cut. For the smaller 4x3 hole i cut underneath the car and for the shifting assembly i cut inside the car. Both times it made a big mess, so you need to remove the carpet and use saftey glasses. There are four mounting bolts for the shifting assembly. Once your able to set the assembly flush to the body, with the rubber mounts on the assembly, drill holes so you can mount it. I had to drill smaller holes and go bigger to cut a large enough hole to fit the extended bolt thru. And just finsh it up by screwing nuts on the end of the bolts. All in all this part is pretty straight forward. Just becarefull not to cut off a finger or two. If you dont know how to cut or drill have someone who is experianced do it. |
|
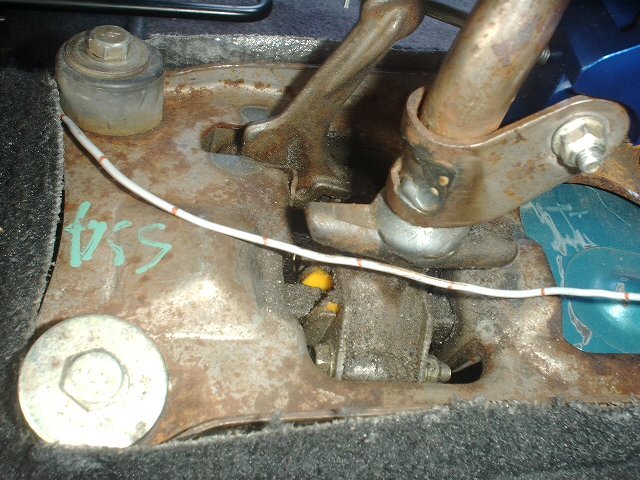 Back end of the shifting assembly Notice how the bolts seems to be angled inward. Im not sure if mine was bent or all prelude shifter assemblies where like that. |
|
 Another shot from the back I wish i rembered to take picture before i put everything back together.... |
|
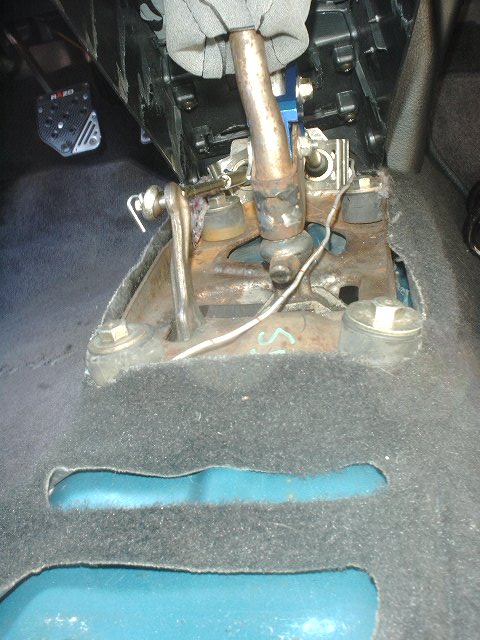
 Stock console took some cliping to fit ok The front mounting bolts nolonger and used due to the fact you have to take out the mounting bracket for them to access the cables. They come out with a couple 10 mm bolts. Also your ganna need to trim the inside of the shifting console. If you look at it you"ll see its not flush there are lines of plastic running down. Clean that all up with a grinder or small sander. Also parts of the lower cup holder need to be cut out so that the clips holding the shifting cables to the shifting assembly. Ill try to post pictures later but i just did it by trail and error. You shouldnt be able to see any of the cuts and grinding you did from the outside of the console. Also the front of the console sits up a bit because i didnt want any cuts showing though but its doesnt bounce around or look that obvious. |
|
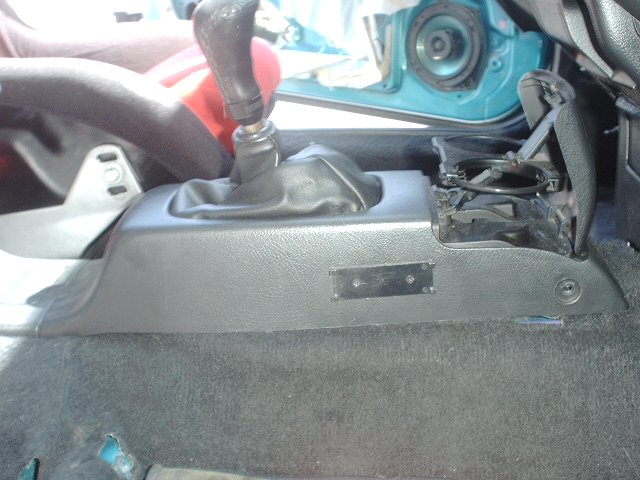 Side of the shifting console It doesnt stick up this much. You just need to push the carpet under the console and push the front down. But there is nothing holding the front down. Its just being held by the carpet pushing outward and the two center 10mm bolts between the shifter and the hand brake. |
|
 OOOOOOooooOOoooOoOoo Your almost done:P |